
Hydroponics for beginners: your complete getting-started roadmap
You do not need a green thumb. You do not need expensive equipment. You need about $10, one hour, and the willingness to try something new.
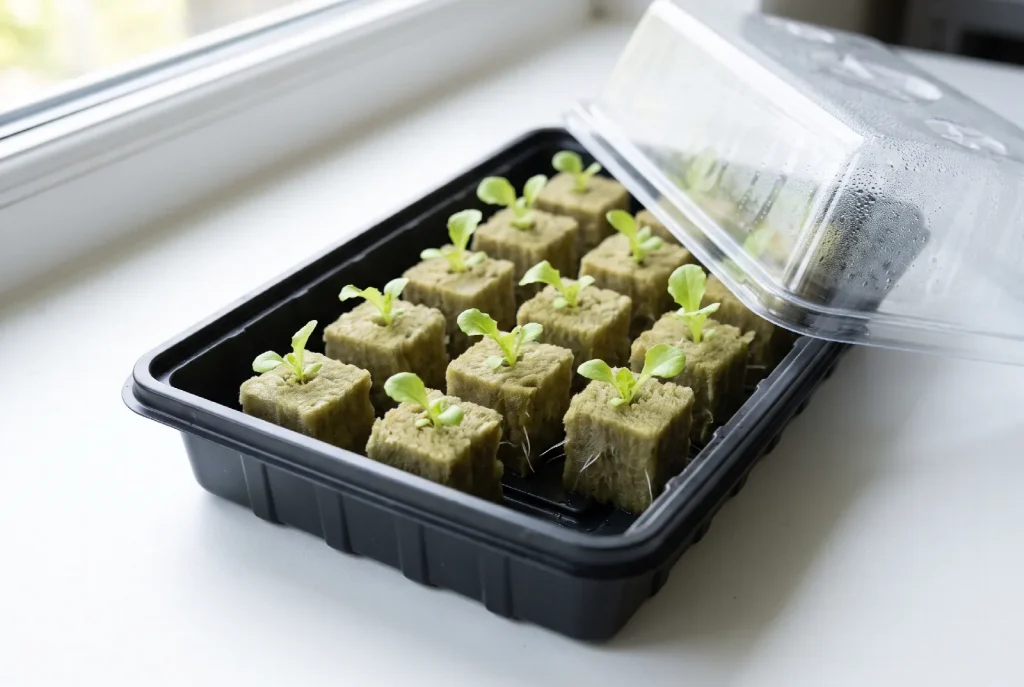
You do not need a green thumb. You do not need expensive equipment. You do not need a backyard, a workshop, or a degree in plant biology. You need about $10, one hour, and the willingness to try something new. That is all.
This guide is for the person who has never grown anything successfully. Who maybe killed a succulent. Who thinks hydroponics sounds like something for scientists in lab coats. We are going to change that.
By the end of this article you will know exactly what to buy, how to build it, and what to expect in your first 30 days.
The beginner mindset (read this first)
Before we talk about buckets and nutrients, let us talk about something more important: your expectations.
Here is what hydroponics is not: a magic system where plants grow perfectly with zero effort. Plants still need attention. Things still go wrong. You will still make mistakes.
Here is what hydroponics is: a more forgiving, faster, cleaner way to grow plants. The mistakes you make are easier to fix. The results come quicker. And the learning curve is far less steep than you imagine.
Expect these things in your first month
- Some plants will not thrive. That is normal. Even experienced growers lose plants. Each failure teaches you something.
- You will check on your plants too often. Also normal. The excitement of seeing daily growth is part of the fun. Eventually you will relax.
- You will obsess over pH. In the beginning every pH reading feels critical. After a few weeks you will develop intuition about when things need adjusting.
- You will want to build bigger systems. This is the most predictable beginner behaviour. One jar becomes four jars. Four jars become a shelf. Embrace it.
Equipment you actually need (under $50)
The hydroponics industry would love to sell you $300 all-in-one systems with apps and LED displays. You do not need that yet. Maybe someday. But not for your first grow.
For a $10 mason jar Kratky system (1 plant)
| Item | What it is | Cost | Where to find it |
|---|---|---|---|
| Mason jar (32 oz) | Wide-mouth glass jar | $2 to $4 | Grocery store, craft store, your cupboard |
| Net pot (3-inch) | Plastic cup with holes | $1 to $2 | Amazon, hydroponic store |
| Clay pebbles | Inert growing medium | $3 to $5 | Amazon, garden centre |
| Nutrient solution | Liquid plant food | $5 to $10 | Amazon, hydroponic store |
| Seeds or seedling | Basil, lettuce, or herb | $2 to $4 | Garden centre, Amazon |
| Total | $13 to $25 |
Many of these items come in multi-packs, so your actual first-plant cost lands at the low end, especially if you already own a jar.
For a $30 bucket DWC system (4 plants)
| Item | What it is | Cost | Where to find it |
|---|---|---|---|
| 5-gallon bucket with lid | Food-grade plastic | $5 to $8 | Hardware store, restaurant |
| Net pots (3-inch, 4x) | For holding plants | $4 to $6 | Amazon |
| Air pump and air stone | Oxygenates the water | $10 to $15 | Pet store aquarium aisle, Amazon |
| Clay pebbles | Growing medium | $5 to $8 | Amazon |
| Nutrient solution | Liquid plant food | $5 to $10 | Amazon |
| pH test kit | Strips or liquid test | $5 to $10 | Pool supply, Amazon |
| Total | $34 to $57 |
Nice to have, but not essential
- pH meter ($10 to $15): more accurate than test strips. Worth buying after your first successful grow.
- EC/TDS meter ($15 to $25): measures nutrient concentration. Helpful but not critical for beginners.
- Grow light ($20 to $40): only needed if you do not have six or more hours of direct sunlight.
- Seedling heat mat ($15): speeds up germination. Optional but nice in cool climates.
See our complete budget gear guide
Build your first system: the $10 mason jar
This is the system we recommend every beginner start with. It is cheap, it is simple, and it works. If you can follow a recipe, you can build this.
For the complete step-by-step, see our dedicated mason jar build guide. What follows is the quick version.
What you will build
A single-plant Kratky system in a mason jar. No pumps. No electricity. No moving parts. The plant sits in a net pot suspended in nutrient solution. As the plant drinks, the water level drops, creating an air gap that oxygenates the roots.
Prepare your jar
Fill your 32-ounce wide-mouth mason jar with water. Add nutrient solution according to the label, usually one to two teaspoons per gallon. Mix well. The water should look slightly cloudy or tinted depending on your nutrients.
Prepare your net pot
Fill your 3-inch net pot with clay pebbles. Rinse them first, they are usually dusty. Place your seedling in the centre, gently supported by pebbles. The roots should touch or nearly touch the bottom of the net pot.
Assemble
Lower the net pot into the jar. The bottom of the net pot should touch the nutrient solution, because the roots need to reach water. If the level is too low, add more. If the pebbles are submerged more than halfway, pour some out.
Place and wait
Put the jar where it gets good light: a sunny windowsill, or under a daylight LED. Check the water level every few days. As the plant drinks, the level drops, and the exposed roots above the water line breathe air. This is the magic of Kratky.
Understanding nutrients, simplified
Nutrients intimidate beginners more than anything else. The word sounds technical. The bottles have chemical names. It feels as though you need a chemistry degree. You do not.
Buy a pre-mixed solution
Do not mix your own nutrients from raw chemicals. Buy a bottle labelled “hydroponic nutrient solution” from a reputable brand. Some beginner-friendly options:
- General Hydroponics Flora Series: the industry standard. Three-part system (Grow, Micro, Bloom).
- MasterBlend: inexpensive, effective, popular with budget growers. Three-part powder.
- AeroGarden Liquid Plant Food: pre-mixed, very simple, works well for small systems.
- Miracle-Gro Hydroponic Plant Food: widely available, affordable, perfectly adequate for beginners.
Follow the mixing instructions on the label. Usually it is something like “two teaspoons per gallon of water.” Mix and pour.
pH: the one number you should watch
pH measures how acidic or alkaline your water is. Plants can only absorb nutrients within a certain pH range. If pH is off, your plant starves even when nutrients are present.
Target pH: 5.5 to 6.5. Most plants prefer around 6.0.
How to test: dip a pH test strip in your nutrient solution and compare it to the colour chart. Takes ten seconds.
- pH too high (above 6.5): add a few drops of white vinegar or lemon juice. Retest. Repeat until in range.
- pH too low (below 5.5): add a tiny pinch of baking soda. Retest. Repeat until in range.
Check pH when you first mix nutrients, then weekly. Read our full Nutrients 101 guide
Best first plants for beginners
Not all plants are equally forgiving. Start with winners: plants that grow fast, tolerate mistakes, and reward you quickly. Confidence comes from early success.
| Plant | Time to harvest | Why it works | Best varieties |
|---|---|---|---|
| Lettuce | 3 to 5 weeks | Fast, forgiving, visible progress daily. Cut outer leaves and it keeps producing. | Buttercrunch, Romaine, loose-leaf mixes |
| Basil | 2 to 4 weeks | Grows explosively in hydroponics. Pinch the top and it bushes out. | Genovese, Thai, sweet basil |
| Spinach | 4 to 6 weeks | Nutritious and tolerates cooler temperatures. Baby leaves in three weeks. | Bloomsdale, Space |
| Cilantro | 3 to 4 weeks | Endless supply if you cook with it. Prefers cooler conditions. | Santo, Calypso |
Plants to avoid as a beginner
- Root vegetables: carrots, potatoes, beets need deep, loose growing media and specific conditions.
- Large fruiting plants: full-size tomatoes, pumpkins, melons need support, heavy feeding, and space.
- Plants that need pollination: cucumbers, squash, and outdoor peppers need insects or hand-pollination.
Cherry tomatoes and peppers can work hydroponically, but save them for your second or third system once you have built confidence with leafy greens.
See our full beginner plant rankings
Your first week: what to expect
The first week is mostly waiting. But here is what should happen.
| When | What happens |
|---|---|
| Day 1 to 2 | You build the system, mix nutrients, and place your seedling. Take a photo. Then wait. The plant looks the same. This is normal. |
| Day 3 to 4 | You might see new root growth below the net pot, and slightly perkier leaves. Or nothing visible yet. Both are fine. |
| Day 5 to 7 | This is when it gets exciting. New leaf growth, a more vibrant plant, roots clearly visible in the solution. |
| Week 2 to 3 | Visibly larger. For lettuce, start harvesting outer leaves. For basil, pinch the top to encourage bushiness. |
| Week 4+ | Leafy greens and herbs are ready for full harvest. Cut and eat. By now you are probably planning a bigger system. |
5 mistakes every beginner makes
We made all of these. Learn from our failures.
See the full list of 15 beginner mistakes
What to build next
Once your mason jar system is thriving, you have three natural next steps.
- Build a multi-plant system ($30 to $50). Upgrade to a bucket DWC system with four net pots. This teaches you about air pumps and water oxygenation.
- Try a different plant. Keep your jar but grow cherry tomatoes or strawberries. These teach you about flowering, fruiting, and pollination.
- Scale up the build. Our $50 PVC system grows six to eight plants in a compact footprint.
You have got this
Thirty days from now you could be eating food you grew yourself. Not from a grocery store. Not from a farmers market. From your windowsill, with your own hands.
Start small. Start cheap. Start today.
Build your $10 system now
The mason jar Kratky plan takes 15 minutes and costs less than a takeaway coffee and a pastry.