
Build a $30 bucket DWC hydroponic system
Four plants in one five-gallon bucket. Your first active system, and the one most growers keep running long after they have built fancier things.
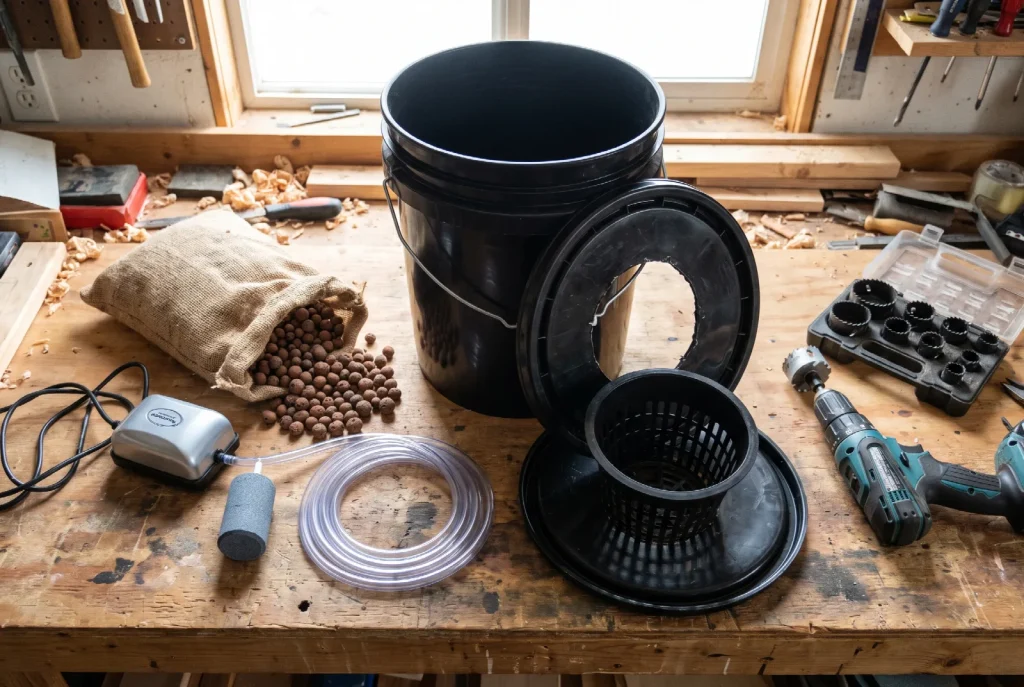
Deep water culture is the natural step up from a Kratky jar. The idea is almost identical: roots sit in nutrient solution. The difference is an air pump bubbling oxygen through the water continuously, which lets you keep the reservoir full, run four plants at once, and grow noticeably faster.
Shopping list
Affiliate disclosure: The Hydroponist is reader-supported. When you buy through links on our site, we may earn an affiliate commission at no extra cost to you. We only recommend products we have researched thoroughly. Your trust matters to us. As an Amazon Associate I earn from qualifying purchases.
| Item | Cost | Notes |
|---|---|---|
| Food-grade 5-gallon bucket with lid | $0 to $8 | Restaurants give these away. Ask for pickle or icing buckets, the smell washes out. |
| 3-inch net pots (4) | $4 to $6 | A 10-pack costs about the same as four, so buy the pack. |
| Aquarium air pump, tubing, air stone | $10 to $15 | A single-outlet aquarium pump is the same hardware sold at three times the price in hydroponics shops. |
| Clay pebbles | $5 to $8 | One bag fills four net pots with room to spare. |
| Hydroponic nutrients | $8 to $15 | The same bottle from your jar build. |
| pH test strips | $5 | More important here than in Kratky, because the solution stays in use longer. |
| Total | $28 to $45 |
Tools: a drill with a 3-inch hole saw. If you do not own one, a sharp utility knife and patience will do it, or ask a hardware store to cut the lid.
Step-by-step build
Cut four holes in the lid
Mark four evenly spaced points on the bucket lid, keeping each at least two inches from the rim and from its neighbours. Cut with a 3-inch hole saw. The net pots should drop in and hang by their lips.
Drill a tubing port
Make one small hole near the lid edge for the air tubing. If your lid has a moulded handle recess, run the tube through there instead and skip the drilling.
Fit the air stone
Connect tubing to the pump, run it through the port, and attach the air stone at the bottom of the bucket. Keep the pump itself above the water line. If it sits lower and the power cuts, water can siphon back into it.
Fill and mix
Fill the bucket with about four gallons of water, leaving room for the net pots to sit an inch or so into the solution. Add nutrients at the label rate for four gallons, adding multi-part nutrients one at a time and stirring between each. Check pH and adjust to between 5.5 and 6.5.
Plant and start the pump
Fill each net pot with rinsed clay pebbles and a rinsed seedling, then set them in the lid holes. The bottoms should just touch the solution. Switch the pump on and leave it running continuously.
Weekly routine
- Top the reservoir back up with plain water as the level drops. Unlike Kratky, you do refill a DWC system.
- Check pH weekly and correct it to 5.5 to 6.5.
- Replace the whole solution every two to three weeks. Nutrient ratios drift as plants feed selectively.
- Confirm the air stone is still bubbling. A blocked stone is the most common DWC failure.
- Look at the roots. Thick, white, and bushy is what you want.
What to grow in it
Lettuce, basil, spinach, kale, chard, and cilantro all thrive. You can also run one cherry tomato or pepper plant on its own in a bucket once you have a season under your belt, though those need support and heavier feeding.
Common problems
Not built the $10 jar yet?
Start there. It takes 15 minutes and teaches you everything this build assumes you already know.