DIY Ebb and Flow Table, and the Two Fittings That Do All the Work
This is the first build on the site that waters on a timer, and it is the one worth graduating to. A bucket holds one plant. A flood table holds eight in the same floor space, handles fruiting crops a bucket struggles with, and runs off a single pump. The whole thing rests on two plastic fittings that cost a few dollars and that almost nobody explains properly, so that is where most of this article goes.
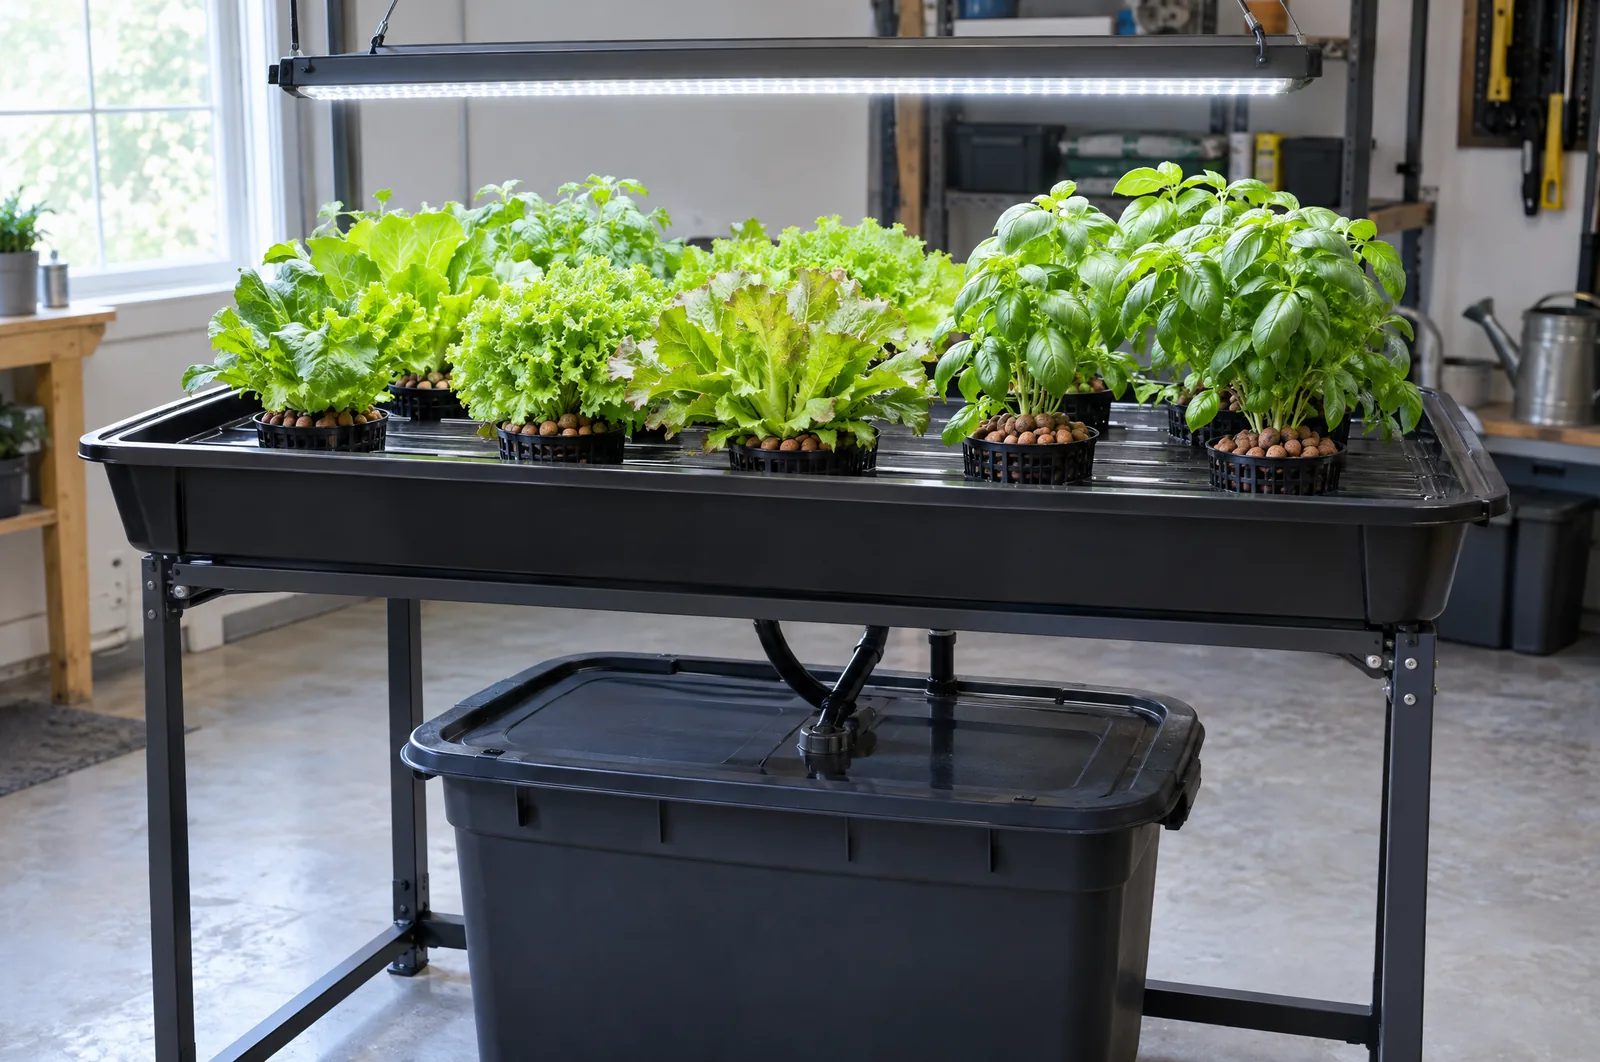
What you are building
A shallow waterproof tray sits on a stand. A reservoir sits underneath it. A pump in the reservoir fills the tray from below on a timer, the solution rises through the growing medium, sits there for a few minutes, and then drains back down under gravity. Air is pulled in behind it as it goes, which is the part that makes the method work. The roots get a drink and a lungful, four or five times a day.
Our page on how ebb and flow works covers the principle. This is the parts list and the build.
It is worth saying what this buys you, because it is not simply more lettuce. A tray gives every plant its own pot of medium rather than hanging bare roots in shared water, which means roots that can hold a heavy plant up and a system that tolerates the weight and the long season of tomatoes and peppers. It is also the first build here where the plants are independent of each other. Lose one to disease in a shared bucket and the rest are already exposed. In a tray you can lift the affected pot out and carry on.
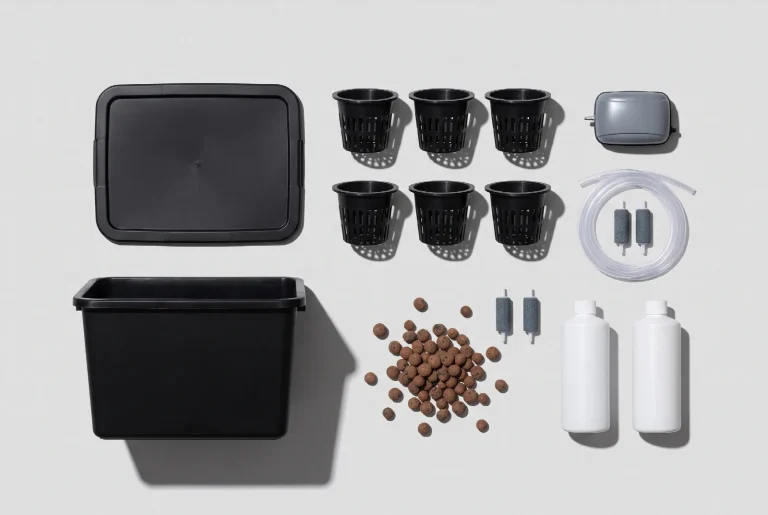
The parts
Affiliate disclosure: The Hydroponist is reader-supported. When you buy through links on our site, we may earn an affiliate commission at no extra cost to you. We only recommend products we have researched thoroughly. Your trust matters to us. As an Amazon Associate I earn from qualifying purchases.
| Part | Cost |
|---|---|
| Flood tray | $30 to $45 |
| Reservoir | $12 to $20 |
| Pump | $15 to $25 |
| Timer | $10 to $15 |
| Fitting kit | $10 to $15 |
| Tubing | $5 to $8 |
| Clay pebbles | $15 to $20 |
| Net pots | $8 to $10 |
Roughly $105 to $160 depending on what you already own. A stand is not listed because almost anything flat and strong enough will do, and water is heavy.
Two notes on the list. Buy the pump oversized, because a pump that fills the tray slowly leaves the roots at the bottom wet for much longer than the ones at the top. And use clay pebbles rather than anything finer. They drain almost instantly and they do not clog the drain, which is exactly what this system asks of a medium. Bark and other light materials float, which in a flood table means they leave.
The two fittings
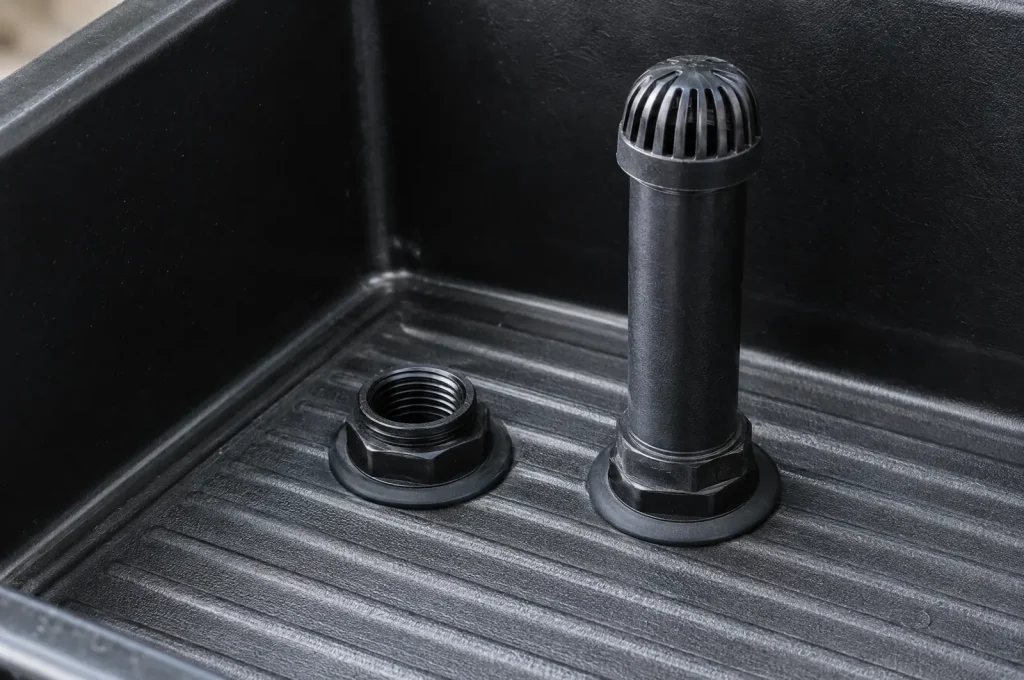
An ebb and flow fitting kit is two bulkhead fittings that pass through the bottom of the tray with a rubber washer each, and they are not interchangeable. This is the thing people get wrong.
- The fill fitting is the short one. Your pump pushes solution up through it and the same hole lets it drain back down when the pump stops. One fitting, both directions, which is why the pump must sit below the tray and why there is no valve anywhere in this system.
- The overflow fitting is the tall one, and it is the clever part. It is an open tube standing up inside the tray with a screen on top. Water rises until it reaches the rim of that tube and then simply pours down it, straight back to the reservoir. It is a safety drain that sets the maximum flood height, and it works whether or not you are watching.
Together they mean the system has no way to overflow. If the timer sticks on, the pump just circulates solution up the fill tube and down the overflow tube until you notice. That is worth understanding before you trust a timer to run while you sleep.
The overflow tube is how you set flood depth. They come with extension sections. Cut or stack it so the water stops just below the top of your net pots, which for most kits means somewhere around an inch of water in the tray. Flooding higher does not feed the plant any better and it drowns the top of the root mass, which is where the oxygen was.
Building it
- Find the two moulded dimples in the floor of the tray, which is where the maker intends the holes to go. Drill them to the size on the fitting packet, a hole saw is cleaner than a spade bit.
- Fit both bulkheads with their rubber washer on the inside of the tray and the nut underneath. Hand tight and then a little more. Over-tightening cracks the tray and that cannot be undone.
- Stand the tray on the stand, put the reservoir underneath, and run tubing from the pump up to the fill fitting. Keep the run short and avoid kinks.
- The overflow needs nothing at all on the underside if the reservoir sits directly beneath it. If it does not, run a second tube from it back to the tank.
- Fill the reservoir, run the pump by hand, and watch the tray fill. Check every fitting for weeping before any plant goes near it.
- Set the overflow height, then drain and time a full cycle so you know how long filling and draining actually take.
Level is not optional
This is the one that catches people, and it is the reason a build that looks finished can still disappoint.
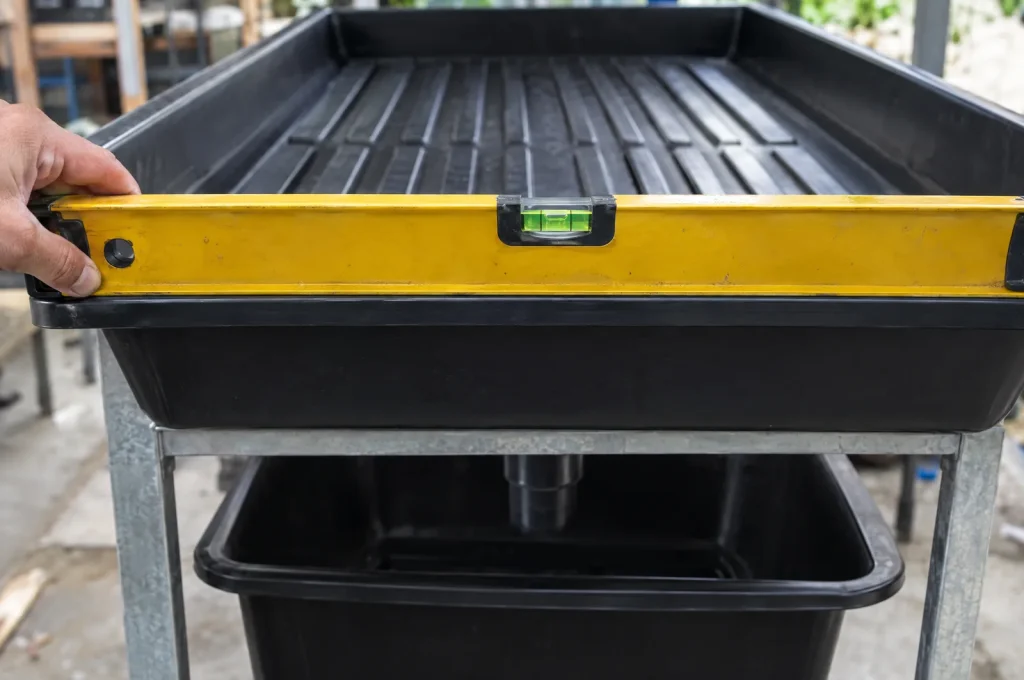
Greenhouse guidance for flood benches is explicit that they must be installed perfectly level, so the depth of liquid is uniform across the whole surface. Put a spirit level across your tray in both directions. A tray that is out by a quarter of an inch floods the low end deeper and the high end shallower, every single cycle, and the plants at the high end are quietly underwatered for the life of the crop while the ones at the low end sit too wet.
It also has to drain completely. A tray that holds a puddle in one corner has a permanently wet patch, and that matters for more than tidiness, as the next section explains. Shim the stand until the level sits true both ways.
Setting the timer
Start at four floods a day of about fifteen minutes each, for clay pebbles, in normal room conditions. Then adjust on evidence rather than on feel. Push your finger into the pebbles halfway down an hour before the next flood. Damp means the schedule is right. Dry means more floods, not longer ones.
More floods in warm bright weather and with big plants, fewer when it is cool or the plants are small. Commercial guidance puts the useful contact time at around ten minutes, which is the time it takes the medium to take up what it needs rather than the time it takes to look wet.
There is a hard upper limit and it is worth knowing exactly. Penn State’s guidance is that ebb and flood irrigation rarely causes Pythium root rot unless irrigation times run long, meaning 45 minutes or more, or the bench does not drain completely and pots sit in puddles. That is a precise threshold rather than general caution. Keep floods well under it, make the tray drain dry, and this system is no more prone to root rot than any other. Break both at once and it is considerably more prone.
Use a mechanical timer with pins rather than a digital one if you can. They fail in the off position and they do not forget their programme after a power cut.
Sizing the reservoir
The reservoir has to hold the flood volume and still have solution left in it, because a pump that runs dry mid-cycle burns out and a tank that nearly empties swings in temperature and strength far faster.
Do the arithmetic once. A two foot by four foot tray is eight square feet, and filling that to one inch takes about five gallons if the tray is empty. It will be less in practice, because the pots and the pebbles displace a good deal of it, which is why commercial guidance puts tank capacity at around half a gallon per square foot of bench rather than at the geometric figure.
Rather than trusting either number, measure yours. Flood the planted tray once from a container you have filled with a known volume, and see what it took. Then run a reservoir at least twice that. For the tray above, a ten gallon tank is comfortable and a five gallon one is not.
Everything in the article on changing your reservoir applies here too, and the larger shared tank is the real reward for the extra plumbing. It drifts more slowly than a bucket does.
What goes wrong
- The tray does not drain fully. Almost always level, occasionally a blocked fill fitting. Both are fixable in ten minutes and both cause real problems if left.
- The pump runs dry. Reservoir too small, or evaporation over a hot week. Mark a minimum line on the tank and keep above it.
- Pebbles in the overflow screen. Keep the screen on. Without it the drain blocks, and a blocked overflow is the only way this design can flood the floor.
- A power cut during a flood leaves the tray full until power returns, because draining depends on nothing but gravity. That is the good news. The bad news is the roots are submerged until then, so do not site this somewhere a long outage would go unnoticed.
- Algae on the tray surface. The tray is wet and lit several times a day, which is ideal for it. A full drain between cycles lets the surface dry, which is most of the answer, and the rest is in the article on algae.
Where this comes from
The 45 minute irrigation threshold and the warning about pots standing in puddles are from Penn State Extension’s fact sheet on Pythium. The requirement for a perfectly level bench, the roughly ten minute contact time and the tank capacity figure of about half a gallon per square foot are from the UMass Amherst greenhouse guidance on subirrigation systems. The observation that expanded clay drains freely and resists clogging, and that bark floats and causes problems in a flood system, is from Oklahoma State Extension’s fact sheet on soilless growing mediums. Prices are typical at the time of writing rather than quotes, and the geometric fill volume is arithmetic rather than a measurement, which is why the article tells you to measure your own.
Found this useful? Tell Google to show you more of it.
Add to Preferred Sources