
Best grow lights for hydroponics: what to look for at every budget
Spec sheets for grow lights are full of numbers designed to impress rather than inform. Here is which ones actually matter.
Affiliate disclosure: The Hydroponist is reader-supported. When you buy through links on our site, we may earn an affiliate commission at no extra cost to you. We only recommend products we have researched thoroughly. Your trust matters to us. As an Amazon Associate I earn from qualifying purchases.
Grow light marketing is unusually bad. Listings quote wattages that are not real, use “equivalent” figures with no basis, and lean on purple light because it photographs well. Three numbers actually matter.
Once you know the real draw, put it into the running cost calculator to see what a light will add to your bill before you buy it.
The three specs worth reading
- Actual power draw. Watts pulled from the wall, not “equivalent” watts. Look for a stated draw in watts. If a listing only says “1000W equivalent”, it is hiding something.
- PPFD at distance. How much usable light reaches the plant, measured at a stated height. Look for 200 to 400 for greens and herbs, 400 to 600 for fruiting crops, and always check the height it was measured at.
- Coverage area. The footprint it lights properly, which is smaller than the footprint it lights at all. Match it to your actual growing area, because intensity falls off sharply toward the edges.
The fourth spec, which almost nobody publishes
Those three tell you whether a light is suitable. A fourth tells you whether it is any good, and it is the one consumer listings leave out.
Efficacy is light produced per watt consumed, written in micromoles per joule. Two panels can both draw 100 watts from the wall and deliver light that differs by half, and efficacy is the number that separates them. It is also the number that decides your electricity bill for a given amount of growth, which makes “most efficient grow light” a question with an actual answer rather than a marketing one.
There is a published benchmark worth knowing. The DesignLights Consortium runs the qualified products list that commercial growers and utility rebate programmes buy from, and its current horticultural requirement, version 4.0, sets the minimum at 2.5 micromoles per joule. The DLC notes that this is more than 45 percent above the most efficient non LED option, the 1000 watt double ended high pressure sodium lamp, and that raising the bar to it removes about 11 percent of the products that qualified under the previous version.
So the practical test is short. Find the real wattage and the PPF, and divide. If the seller publishes neither, or publishes PPFD only, you cannot work it out, and a light whose efficacy cannot be calculated is almost never a good one, because efficacy is the first thing a good manufacturer puts on the page.
None of which means a home grower needs a certified fixture. A cheap panel on a windowsill shelf is a perfectly sensible purchase. It means that when two lights look alike and one costs twice as much, this is the number that tells you whether you are buying anything, and the running cost calculator turns the difference into money over a year.
Full spectrum white beats purple
Early LED panels used only red and blue diodes because those wavelengths drive photosynthesis most efficiently, which is where the purple glow came from. Modern full-spectrum white LEDs are now efficient enough that the small theoretical advantage is gone, and white light has two practical benefits: you can actually see your plants properly to spot problems, and it does not turn a room into a nightclub.
What to buy at each budget
| Budget | Light | Good for |
|---|---|---|
| $0 | Sunny windowsill | Herbs and greens |
| $10 to $20 | Daylight LED bulb | One or two jars |
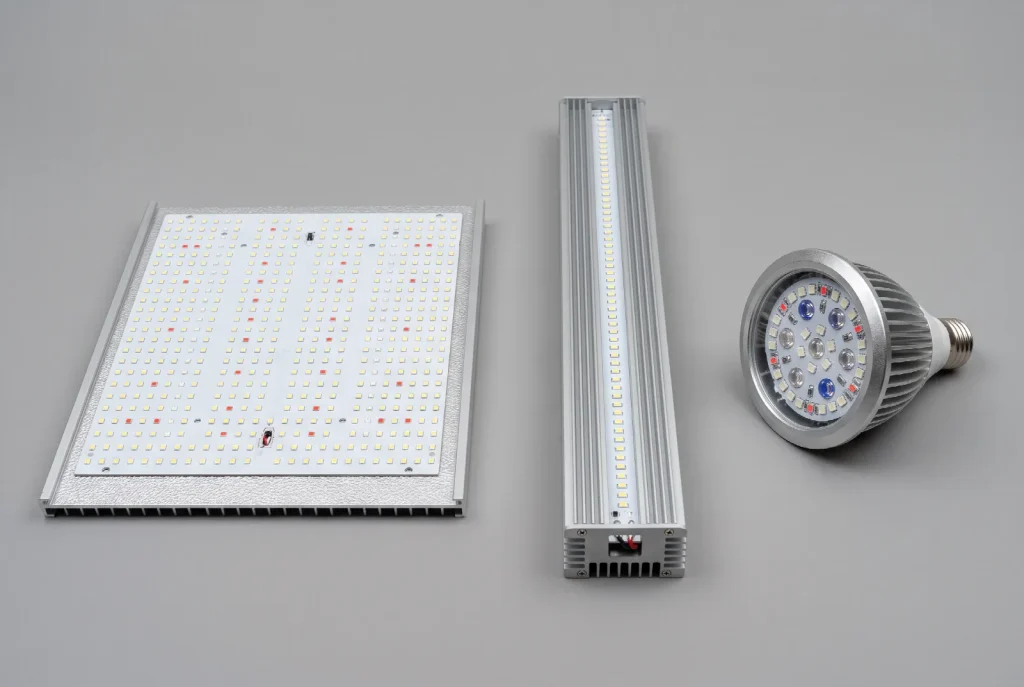
| $25 to $40 | Small LED panel | A shelf or a bucket |
| $60 to $120 | Larger LED panel | Peppers and tomatoes |
| $150 plus | Commercial panel | Multi tier growing |
- The windowsill is genuinely sufficient for leafy crops if the shadow test is sharp. Try it before buying anything.
- A desk lamp with a 5000K to 6500K bulb is perfectly adequate for a single Kratky jar, and it is the cheapest real upgrade there is.
- A 30 to 60 watt panel is the sweet spot for most home growers. Look for a dimmable model with a built in timer.
- A 100 to 150 watt panel is only worth it for fruiting crops or a multi shelf setup.
- Commercial panels are beyond what a home grower needs to start. Revisit after a year.
Buying for what you actually grow
The budget table answers “how much”, and the crop answers “how much of that is enough”.
Lettuce, greens and herbs are cheap to light. They want modest intensity over a long day, which is why a windowsill or a desk lamp genuinely works for them and why the $25 to $40 tier covers a whole shelf. If greens are the plan, buying up the table is spending money on headroom you will not use.
Tomatoes, peppers and strawberries are not. They need both higher intensity and more hours, so the fixture has to deliver more light over a longer day, and that combination is what pushes you into the $60 to $120 tier rather than any single number on the spec sheet. A fruiting crop under a greens light grows, flowers late and sets little.
Our lighting guide has the hours and intensity each crop wants, along with the shadow test for working out whether your windowsill is already enough. Read it before you buy anything, because for a lot of people the answer is that the window will do.
One light, seedlings through to harvest
A light that suits a mature plant will scorch a seedling at the same height, and a light set safely for seedlings is too far away to do much for anything bigger. There are two ways out and most people only know about one.
Raising and lowering the fixture is the obvious one, which is why adjustable height is on the feature list below. Dimming is the better one, because it changes the intensity without changing the geometry, so the coverage stays even across the tray instead of narrowing as you lower the light. A dimmable panel is one fixture that serves a nursery tray and a finished crop, and on a succession rotation, where both are happening under the same light at once, it stops being a convenience and starts being the thing that makes the rotation workable.
Spectrum tuning, where separate channels shift the colour mix by growth stage, is sold hard at the premium end. For greens and herbs under a full spectrum white panel there is very little in it, and the money is better spent on a dimmable fixture with honest numbers.
Features worth paying for
- A built-in timer. Saves buying a separate one and removes the most common lighting error.
- Dimming. Lets one light serve seedlings and mature plants without remounting it.
- Adjustable hanging height. You will raise the light as plants grow. Fixed-height clamp lights become annoying quickly.
- A real warranty. LED panels do fail. A two-year warranty from a seller with a traceable address is worth more than 20 extra watts.
Related: how much light your plants actually need
Where this comes from
The efficacy benchmark is from the DesignLights Consortium’s Horticultural Technical Requirements version 4.0, which sets the minimum photosynthetic photon efficacy for its qualified products list at 2.5 micromoles per joule, states that this is more than 45 percent above the most efficacious non LED option, the 1000 watt double ended high pressure sodium luminaire, and notes that the increase delists roughly 11 percent of the products listed under version 3.0. The earlier thresholds of 1.90 and 2.30 micromoles per joule are from versions 2.0 and 3.0 of the same document. The PPFD bands, the crop hours and the distance guidance are set out with their own sources in our lighting guide. Prices are typical at the time of writing rather than quotes.
Build before you buy
Every plan on this site is free, and the most popular one costs about $10 and takes 15 minutes.